Soft-luxury living

Category: Food & Recipes

Recipes, bakes and food inspiration.

  • Cozy Weeknight Ramen: A Comfort Bowl to Crave

    Cozy Weeknight Ramen: A Comfort Bowl to Crave

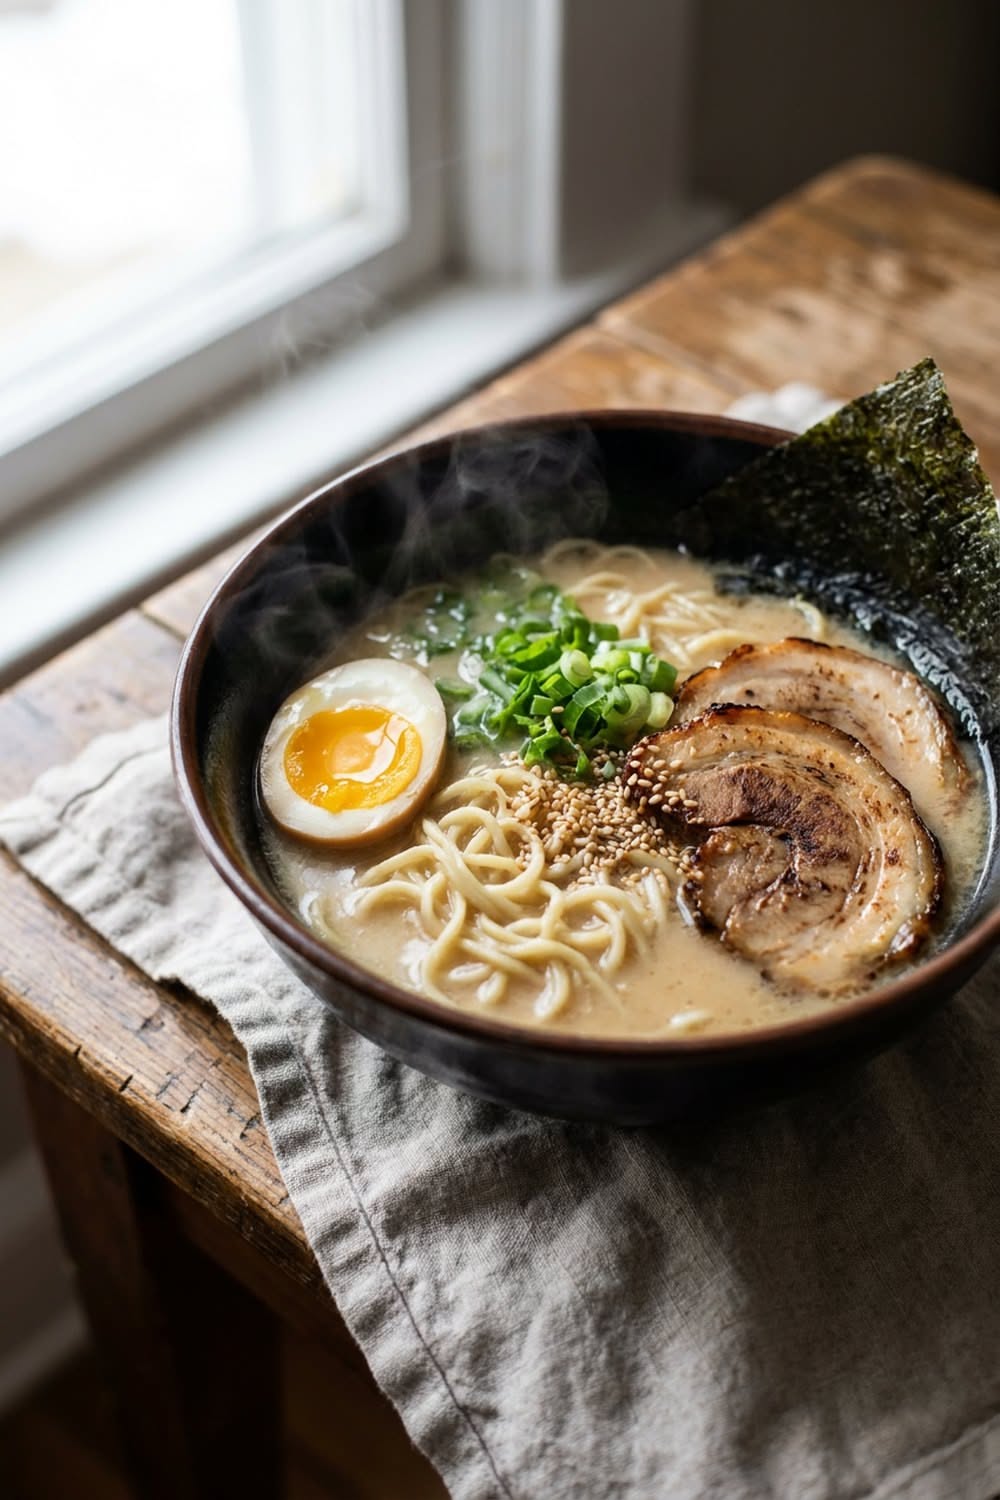
    Real ramen shops simmer broth for a day. On a Tuesday night, you and I are not doing that, and the wonderful secret is that we do not have to. With a few pantry heroes you can build a bowl in half an hour that steams, slurps and comforts like the real thing.

    The 30-minute broth that tastes like hours

    For two bowls: soften 3 minced garlic cloves and a thumb of grated ginger in a tablespoon of oil. Add 1 tablespoon white or red miso and let it toast for thirty seconds. Pour in 4 cups of good chicken or vegetable stock, add 2 tablespoons soy sauce, 1 tablespoon mirin (or a pinch of sugar) and a teaspoon of sesame oil. Simmer 15 minutes. Taste: it should be a little saltier than soup you would eat alone, because noodles dilute it. A splash of milk or soy milk at the end gives a creamy tonkotsu-style body if you like it rich.

    The jammy egg, timed to the second

    Lower fridge-cold eggs into boiling water and cook exactly 6 minutes 30 seconds, then straight into iced water. Peel gently. For next-level eggs, marinate them for a few hours in equal parts soy sauce, mirin and water. Halved on top of the bowl, the soft centre is the whole point.

    Noodles and assembly

    1. Cook fresh or dried ramen noodles separately, one minute less than the packet says, and drain well. Never cook them in the broth.
    2. Warm the serving bowls with hot water first: ramen cools fast.
    3. Noodles in first, broth over, then arrange toppings in neat sections rather than a jumble.

    Topping ideas, from minimal to loaded

    • Essentials: jammy egg, sliced scallions, a sheet of nori.
    • Vegetables: quick-seared mushrooms, corn, spinach wilted in the broth, bean sprouts.
    • Protein: shredded rotisserie chicken, leftover pork, crispy tofu.
    • Finishers: chili crisp, black garlic oil, toasted sesame, a knob of butter with corn for Hokkaido style.

    Make it your house bowl

    The beauty of weeknight ramen is that it is a template, not a recipe. Miso for depth, soy for salt, something aromatic, something silky, something crunchy. Once you have made it twice you will stop measuring, and that is when it becomes your signature comfort food. Serve immediately, slurp audibly: in ramen culture that is a compliment.

    Save this cozy bowl to your dinner board, and find more easy comfort food recipes on Plumeo. Daily cravings at @Plumeoblog.
  • Shakshuka: The One-Pan Wonder Breakfast

    Shakshuka: The One-Pan Wonder Breakfast

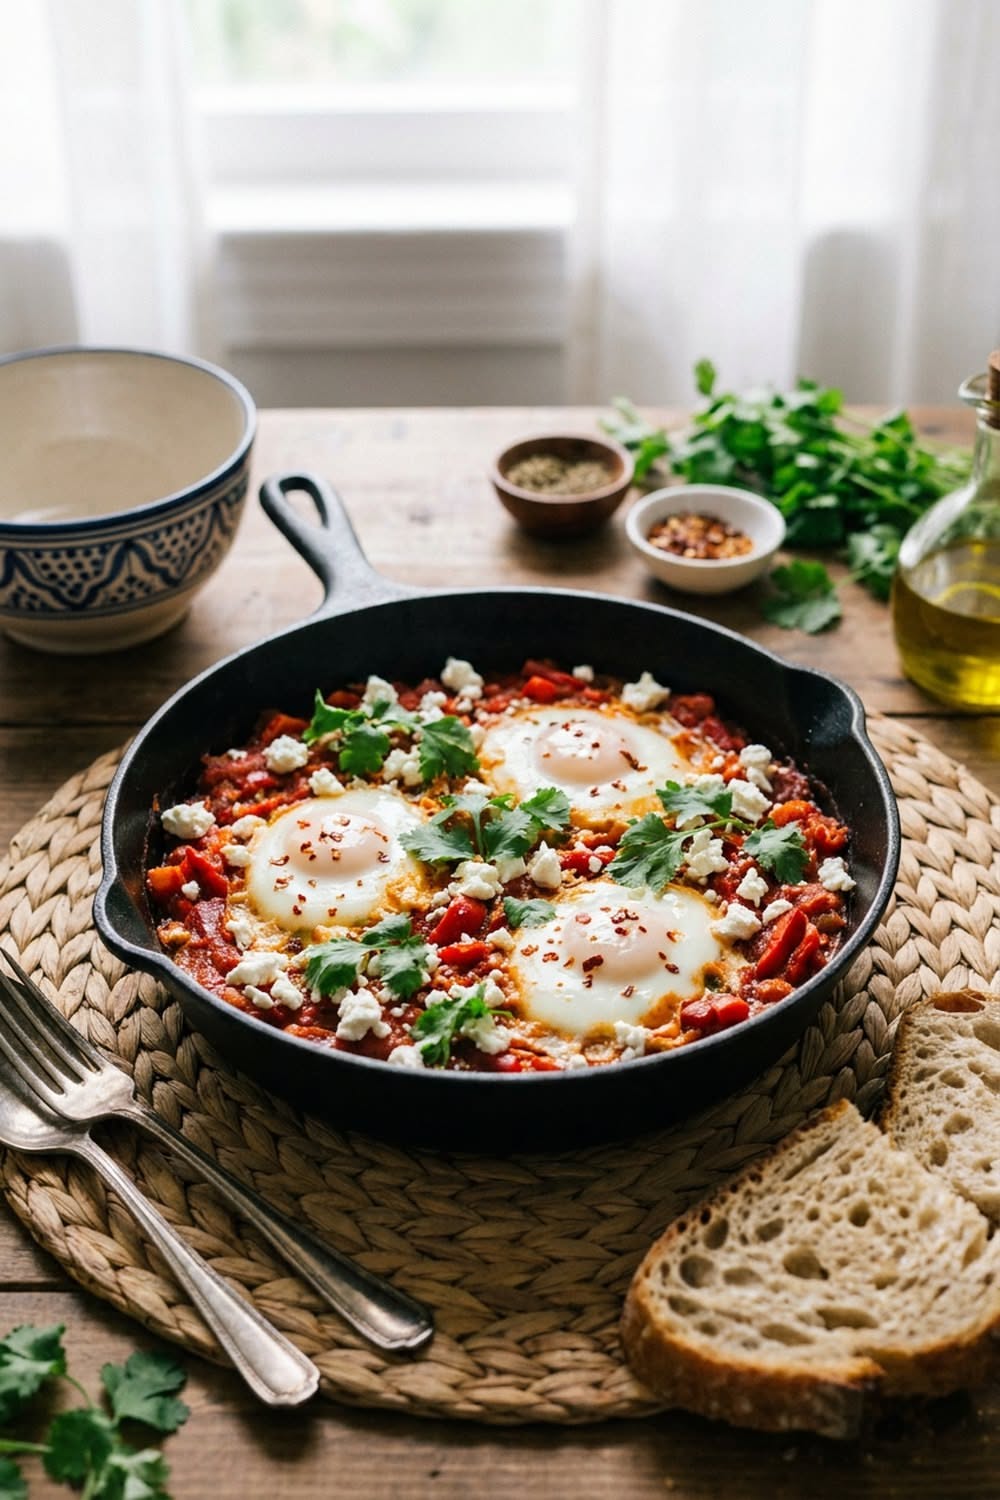
    Shakshuka is the one-pan dish that refuses to stay in its breakfast lane: eggs poached directly in a smoky, spiced tomato and pepper sauce, eaten from the skillet with bread and no regrets, at any hour you please. It is North African by birth, beloved across the Middle East, and quite possibly the best effort-to-glory ratio in all of egg cookery.

    Build the sauce with patience

    In a wide skillet, warm 3 tablespoons of olive oil and soften one sliced onion and one sliced red bell pepper for a full 10 minutes, until sweet and beginning to catch color: this slow start is the flavor foundation. Add 3 minced garlic cloves, a teaspoon of ground cumin, a teaspoon of sweet paprika and a pinch of chili flakes (or a spoonful of harissa for the properly ambitious), and bloom for one fragrant minute.

    Tomatoes, then patience again

    Add a 400g can of crushed tomatoes (plus a splash of water), a pinch of sugar and a good seasoning of salt. Simmer 10 to 15 minutes until the sauce thickens enough that a spoon dragged through leaves a brief trail: watery sauce makes watery shakshuka, and thickness is what holds the egg wells open. Taste now and correct: the sauce should be bold enough to stand up to the eggs.

    The eggs: wells and lids

    1. Make small wells in the sauce with the back of a spoon.
    2. Crack an egg into each: 4 to 6 fit a standard skillet.
    3. Season the eggs, lid on, and simmer gently 6 to 9 minutes.
    4. Pull when whites are just set and yolks still wobble: they finish in the pan’s heat.

    The runny yolk is structural: it becomes the sauce’s second act when broken with bread.

    Finish like you mean it

    Crumbled feta over the top (it softens into creamy pockets), chopped parsley or cilantro, a drizzle of olive oil, and chili flakes for the brave. Bring the whole skillet to the table on a trivet, hand out warm pita, challah or crusty bread, and let everyone excavate. Plates are technically optional; bread is not.

    Make it yours

    The sauce is a stage: wilt in spinach or kale, add crumbled sausage or chickpeas for heft, swap in green shakshuka (tomatillos and greens) when tomatoes are out of season. The sauce alone keeps three days in the fridge, meaning tomorrow’s breakfast is eight minutes away, most of it lid-on waiting. Few dishes work this hard while looking this good doing it.

    Save this one-pan hero, and crack into more cozy recipes on Plumeo. Daily deliciousness at @Plumeoblog.

  • The Perfect Açaí Bowl at Home

    The Perfect Açaí Bowl at Home

    The açaí bowl is breakfast styled like a jewel box: deep purple, piled with fruit and granola, and, at a cafe, priced like it was flown in first class. The homemade version costs a fraction, takes five minutes, and, once you learn the one technique that matters, comes out thicker and creamier than most of the bowls you have paid for.

    The base: thick or nothing

    The universal disappointment with homemade bowls is soupiness, and the cause is always too much liquid. The formula: two packets (200g) of frozen unsweetened açaí purée, one frozen banana, a handful of frozen berries, and only a splash, 60ml at most, of milk or juice. Blend on low, stopping to scrape and press the mixture down repeatedly (a blender tamper is the real MVP here). It should fight the blender: the texture you want is soft-serve, spoonable and standing in peaks, never pourable.

    What açaí actually brings

    Açaí berries from the Amazon are tart, faintly chocolatey and barely sweet on their own, which is why the banana matters for body and sweetness. The frozen packets sold in supermarket freezer aisles are the same ones cafes use. No packets available? A respectable stand-in: frozen blueberries and blackberries with a spoonful of cocoa gets you surprisingly close in color and flavor.

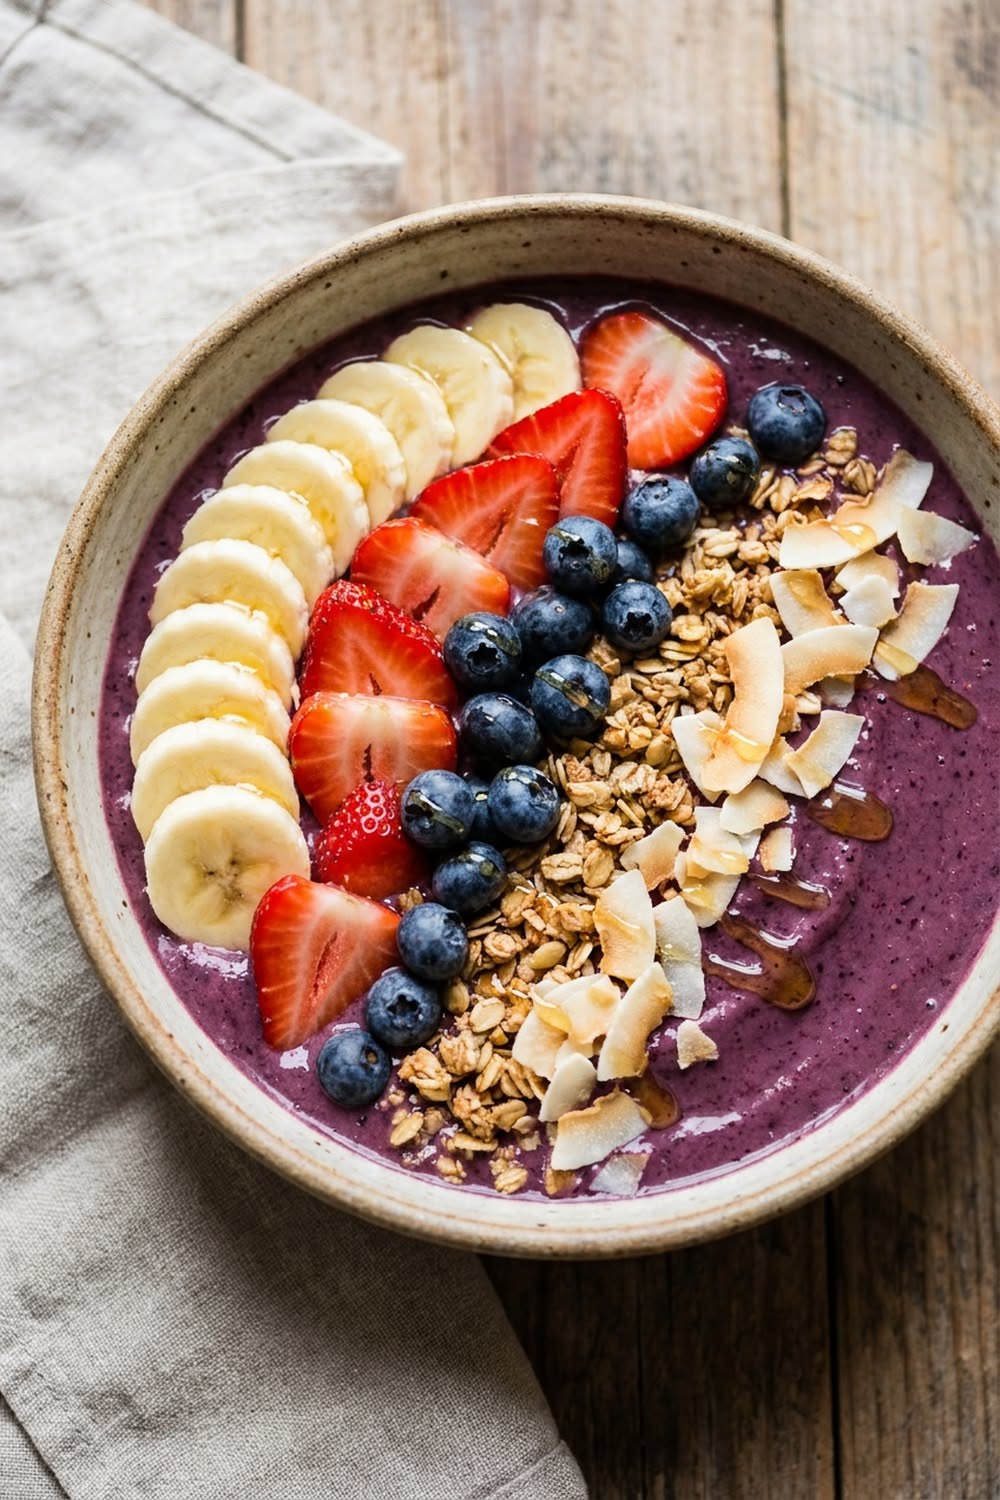
    Topping architecture

    • Crunch: granola, always: plus cacao nibs or toasted coconut flakes.
    • Fresh fruit: banana coins, sliced strawberries, blueberries, arranged in rows because the rows are half the joy.
    • Richness: a ribbon of peanut or almond butter, drizzled with authority.
    • Finishers: chia or hemp seeds, a little honey, a few edible flowers if you are feeling like a cafe.

    Top in sections rather than scattering: the stripes of color are what make the bowl feel like an event.

    Make it a real breakfast

    Fruit-on-fruit can leave you hungry by ten. Blend a scoop of protein powder or a spoonful of nut butter into the base, or add Greek yogurt for creaminess and staying power, none of it dulls the purple. With the seeds and granola on top, the bowl graduates from pretty snack to actual fuel.

    The five-minute morning routine

    Keep bananas pre-sliced in the freezer, açaí packets rinsed under warm water for ten seconds so they break into blendable chunks, and toppings decanted into jars. Chill the bowl itself in the freezer while you blend, it keeps the base thick to the last spoonful. Total time, freezer to Instagram-worthy: five minutes, and the only queue is at your own counter.

    Save this recipe to your breakfast board, and blend up more fresh recipes on Plumeo. Daily deliciousness at @Plumeoblog.

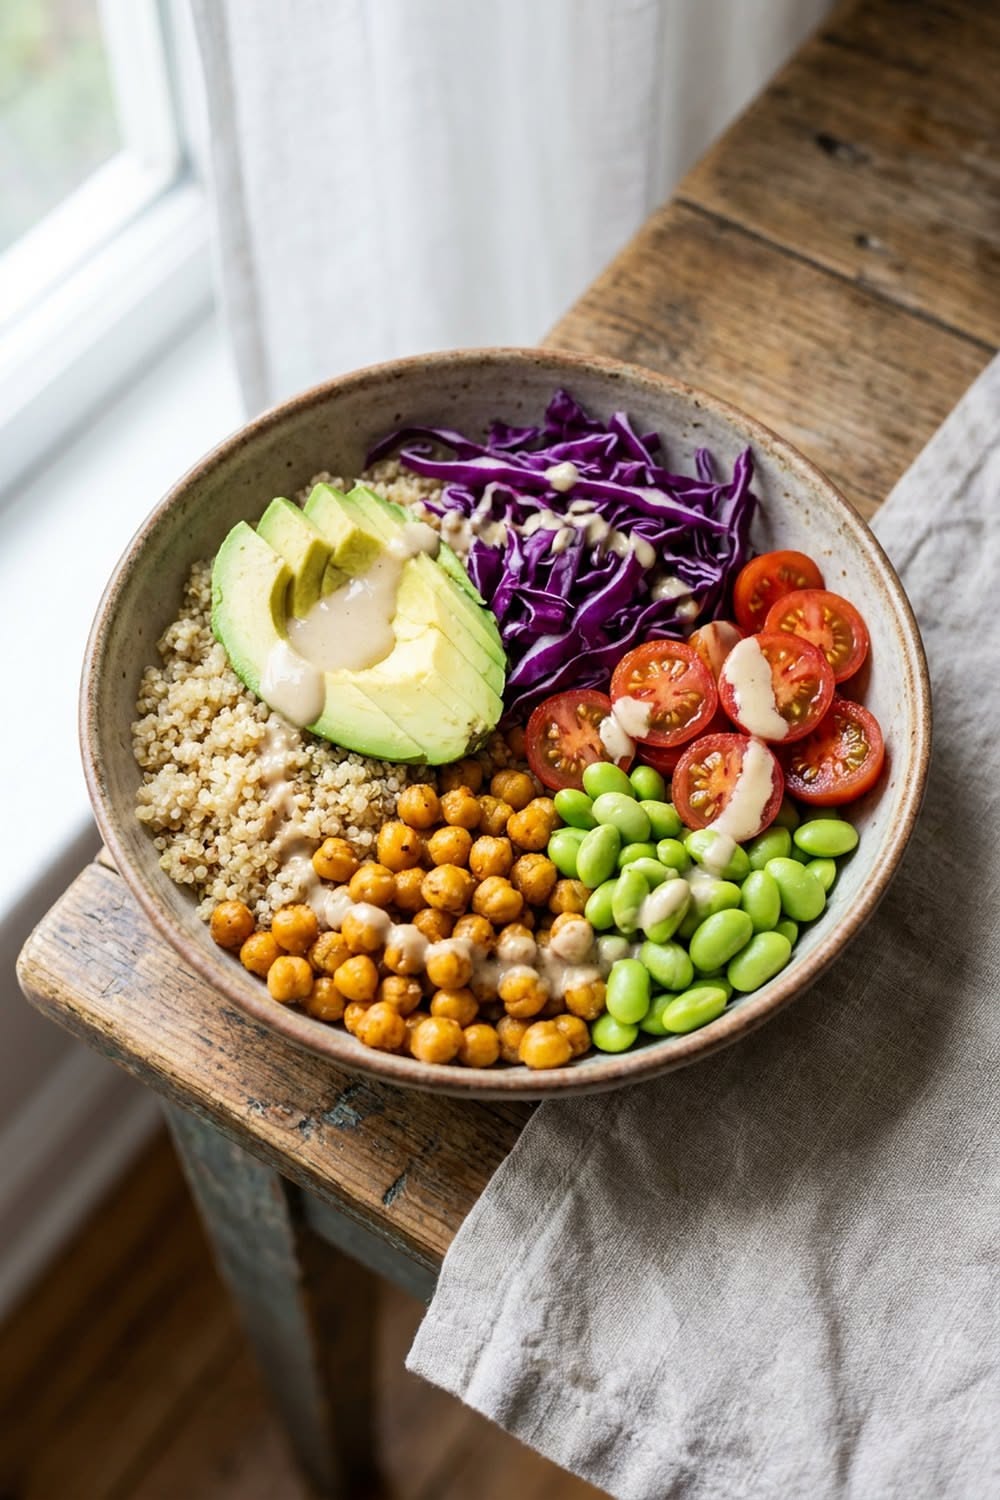
  • The Nourishing Buddha Bowl Formula

    The Nourishing Buddha Bowl Formula

    The buddha bowl is less a recipe than a philosophy: take a grain, pile it with vegetables in every color you own, add something protein-rich, something crunchy, and a sauce that ties the room together. It is the meal that makes eating well feel abundant instead of austere, and once you learn the formula, you can build one from almost any fridge.

    The five-part formula

    1. Base grain (1/4 of the bowl): quinoa, brown rice, farro or couscous, cooked in stock for free flavor.
    2. Vegetables (half the bowl): a mix of roasted (sweet potato, cauliflower, chickpeas) and fresh (cucumber, shredded carrot, greens).
    3. Protein: crispy tofu, a soft-boiled egg, grilled chicken, falafel or those roasted chickpeas doing double duty.
    4. Crunch and richness: toasted seeds, nuts, half an avocado, quick-pickled onions.
    5. The sauce: generous, glossy, non-negotiable: a dry bowl is a salad with ambitions.

    The tahini dressing worth memorizing

    Whisk 3 tablespoons tahini with the juice of half a lemon, a grated garlic clove, a teaspoon of maple syrup and a pinch of salt, then thin with cold water a spoonful at a time until it pours like cream (it seizes first, then smooths: keep going). It keeps a week in a jar and improves everything it touches. Rotate in a peanut-lime version (peanut butter, lime, soy, sriracha) and a green one (blended herbs, yogurt, lemon) and you have a month of different bowls.

    Roast like you mean it

    The difference between a fine bowl and a great one is caramelization. Roast vegetables at 220°C on a spacious tray, cut sides down, until the edges genuinely brown, about 25 to 30 minutes for sweet potato and cauliflower. Toss chickpeas in olive oil, smoked paprika and cumin and roast them alongside until crackly. Sweetness plus char plus the cool fresh vegetables is the contrast the whole bowl runs on.

    Three combos to start with

    • The classic: quinoa, roasted sweet potato and chickpeas, kale, avocado, pickled red onion, tahini dressing.
    • The Bangkok: brown rice, crispy tofu, shredded carrot and cabbage, cucumber, peanuts, peanut-lime sauce.
    • The Mediterranean: couscous, falafel, cherry tomatoes, cucumber, olives, feta, green herb sauce.

    Meal-prep the parts, not the bowl

    Cook a pot of grain, roast two trays of vegetables, make one sauce and a jar of quick pickles on Sunday: store everything separately and assemble in ninety seconds all week. The bowl stays vivid instead of soggy, and lunch becomes the best-looking thing on the table every single day.

    Save this formula to your healthy board, and build more fresh recipes with Plumeo. Daily deliciousness at @Plumeoblog.

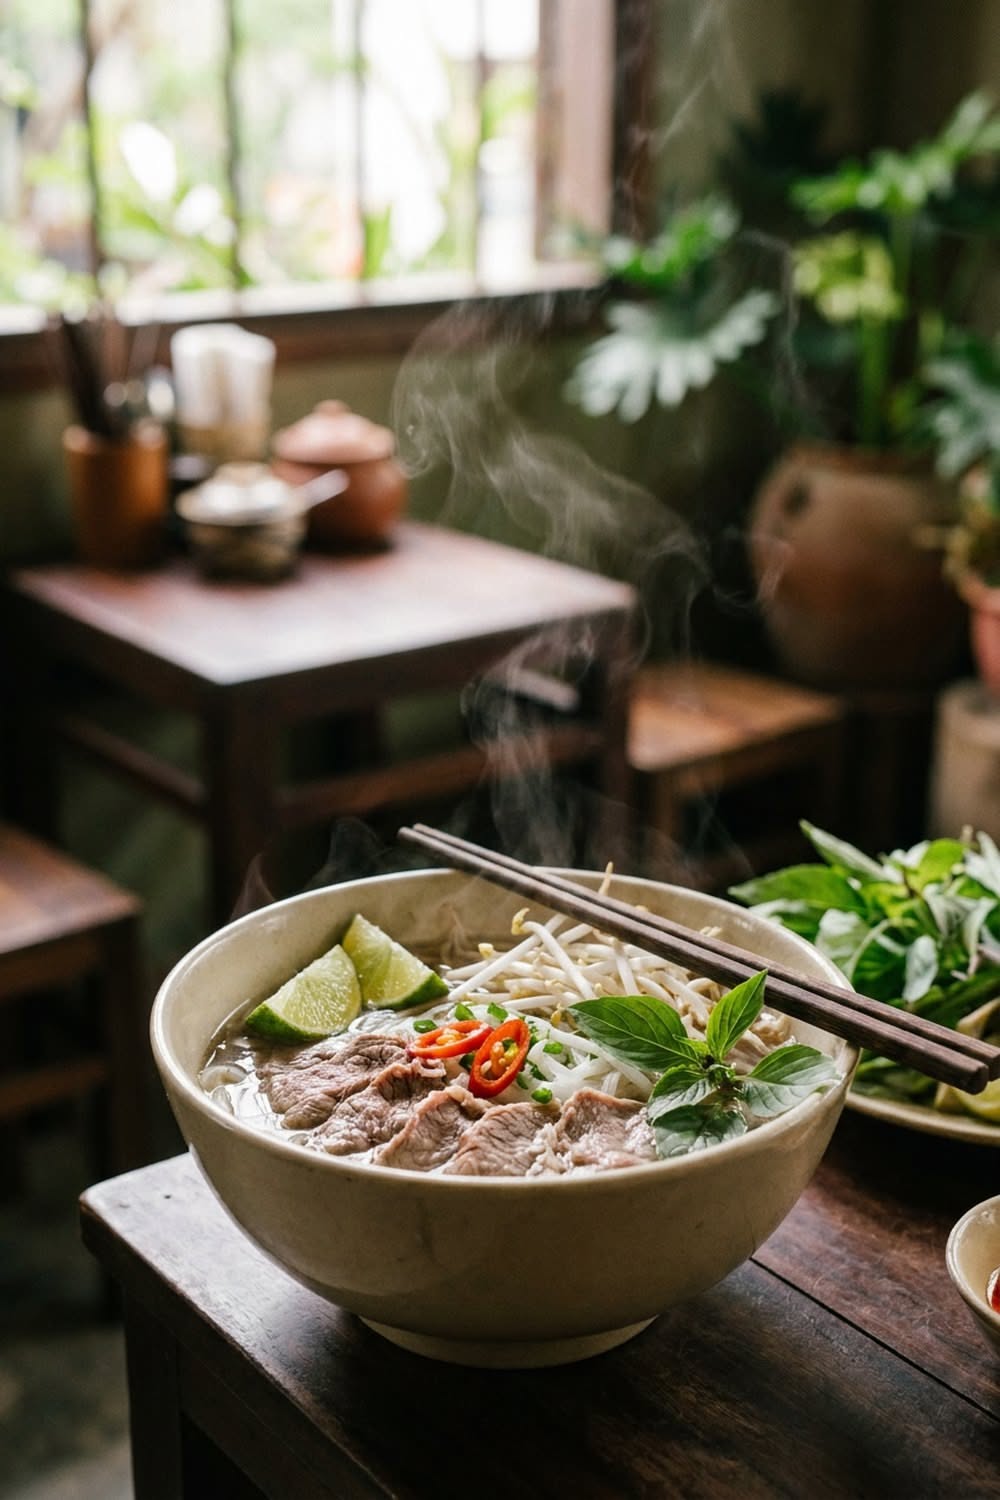
  • Vietnamese Pho: The Broth Worth the Wait

    Vietnamese Pho: The Broth Worth the Wait

    Pho is a soup with a soul, and the soul lives in the broth: clear, beefy, perfumed with star anise and charred ginger, the kind of liquid you drink to the last spoonful and think about later. Great pho at home is not difficult: it is simply slow, and nearly all of the slowness is unattended simmering that makes the whole house smell like Hanoi.

    The two flavor keys: char and toast

    First, char: halve an onion and a fat hand of ginger and blacken them, cut side down, under a broiler or directly over a flame until genuinely scorched. That char is pho’s signature smoky depth. Second, toast: in a dry pan, warm 3 star anise, a cinnamon stick, 4 cloves, a teaspoon of coriander seeds and a black cardamom pod if you can find one, until fragrant. These two steps take ten minutes and are 80 percent of what makes pho taste like pho.

    The broth: patience in a pot

    1. Blanch 1.5 kg of beef bones (marrow and knuckle) in boiling water for 5 minutes, then rinse: this is the clarity step.
    2. Cover with 3 litres of fresh water: add the charred onion and ginger, the toasted spices, a tablespoon of salt and 2 tablespoons of fish sauce.
    3. Simmer, barely bubbling and partially covered, for 3 to 4 hours, skimming early and often.
    4. Strain, then season to balance: more fish sauce for depth, a small knob of rock sugar or a pinch of sugar for roundness.

    The finished broth should be clear enough to see the bottom of the ladle and aromatic enough to stop conversation.

    The bowl build

    Soak flat rice noodles per the packet and divide between deep bowls. Top with paper-thin slices of raw beef sirloin (freeze the beef 30 minutes for slicing; the boiling broth cooks it in the bowl) plus, if you like, brisket simmered in the pot. Ladle the broth over screaming hot, that pour is the cooking step, and finish with sliced onion and scallions.

    The herb plate is not garnish

    Serve a heaped plate of Thai basil, cilantro, bean sprouts, lime wedges and sliced chilies alongside, with hoisin and sriracha within reach. Everyone builds their own bowl at the table, tearing herbs in by the handful: this interactivity is half the meal. The broth freezes beautifully, which means one slow Sunday funds a month of twenty-minute pho nights, a trade every noodle lover should make at least once a season.

    Save this project for a slow Sunday, and slurp through more comfort recipes on Plumeo. Daily deliciousness at @Plumeoblog.

  • Glazed Donuts: The Homemade Dozen

    Glazed Donuts: The Homemade Dozen

    A yeast-raised glazed donut, eaten while the glaze is still setting, is one of those foods that briefly justifies everything. The bakery version peaks at ten minutes old, which means the truly fresh donut is only available to people willing to fry at home. It is easier than its reputation: soft dough, careful oil, thin glaze, and the discipline to share.

    The dough: soft and slow

    Dissolve 2 teaspoons of yeast in 240ml warm milk with a spoonful of sugar. Add 2 egg yolks, 50g sugar, 55g soft butter, a teaspoon of vanilla and a half teaspoon of salt, then work in roughly 420g of flour to a soft, supple dough. Knead 8 minutes, cover, and rise until doubled, about an hour. This dough should feel like a pillow with plans: softer than bread dough, silkier than roll dough.

    Shape and second rise

    Roll to 1 cm thick and cut with a donut cutter, or a large glass plus a bottle cap for the holes (which you fry too: cook’s privilege). Rest the rings on individual parchment squares for 30 to 45 minutes until puffy: the parchment squares matter, letting you lower each donut into oil without deflating the rise your patience just built.

    Frying: temperature is everything

    1. Heat 5 cm of neutral oil to 175°C: use a thermometer, this number is the recipe.
    2. Fry 2 or 3 at a time, about 60 to 90 seconds per side, to an even deep gold.
    3. Too hot and they brown raw: too cool and they drink oil: adjust the flame between batches.
    4. Drain on a rack, never paper towels alone: racks keep the crust.

    The glaze: thin, glassy, generous

    Whisk 250g powdered sugar with 60ml milk and a teaspoon of vanilla until it runs off the whisk in a smooth ribbon. Dip each donut while warm, both sides for the full bakery effect, and set on the rack so the glaze drips, levels and turns translucent as it sets. That fragile crackle-shell is the signature of a donut in its prime, a prime measured in minutes: gather your audience before you glaze.

    Variations for the second batch

    Chocolate glaze (add 3 tablespoons of cocoa and a touch more milk), cinnamon sugar rolled on hot, or a maple glaze with flaky salt. The dough also accepts jam-filling ambitions: cut solid rounds, fry, and pipe in raspberry jam. But the plain glazed, warm, is the benchmark: master it once and your kitchen develops a reputation it will never live down.

    Save this for a weekend project, and glaze through more baking recipes on Plumeo. Daily sweetness at @Plumeoblog.

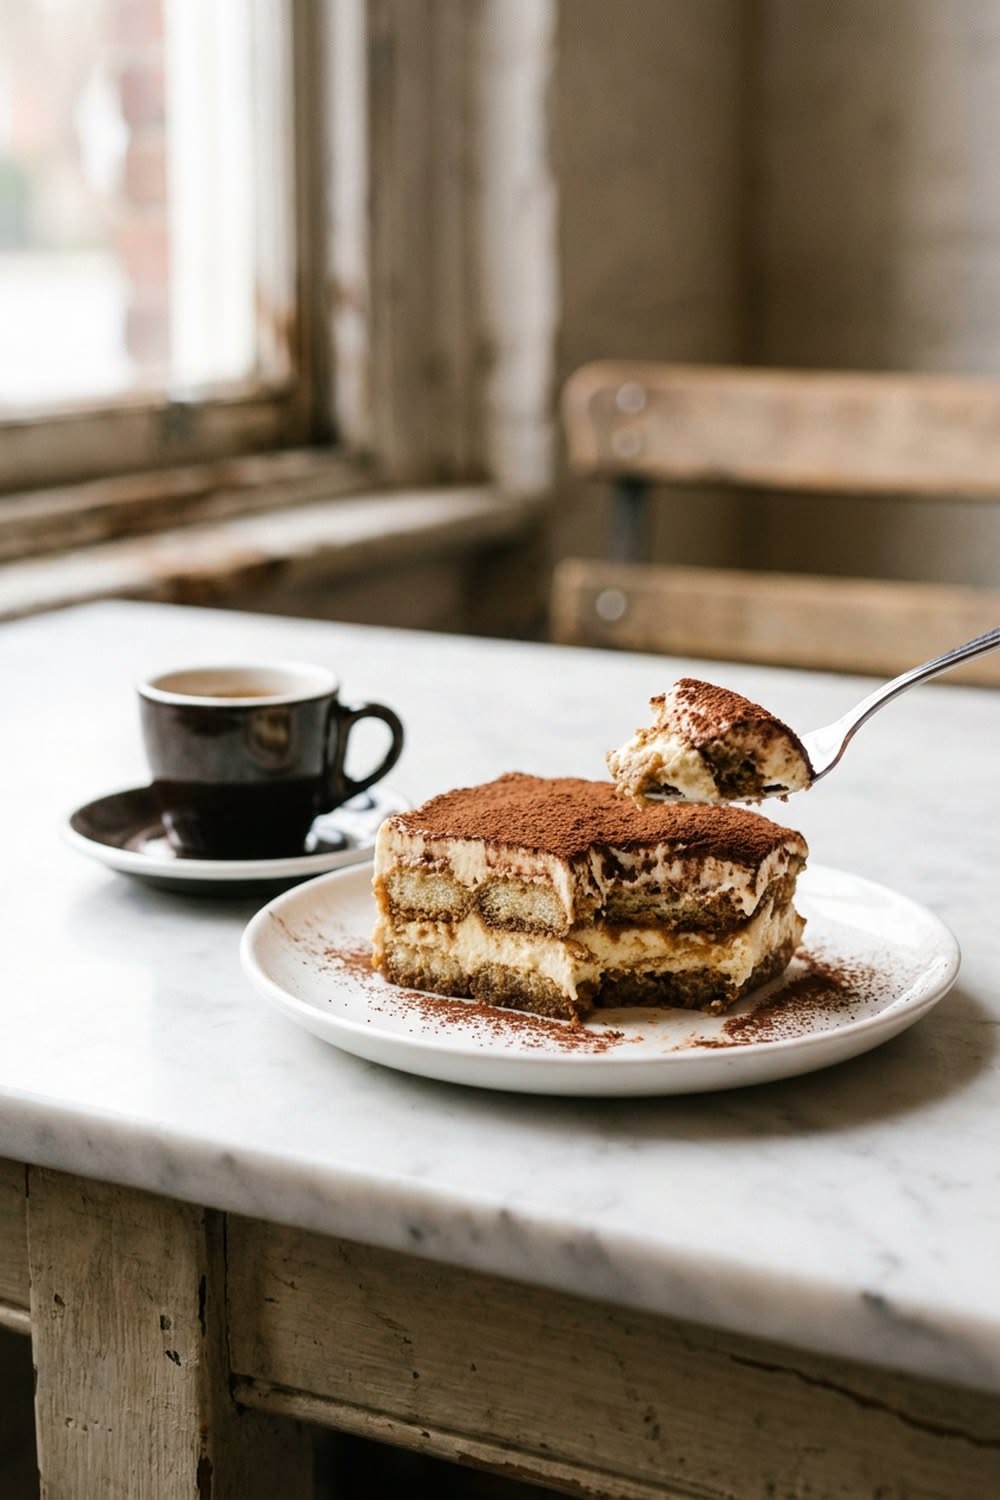
  • Real Tiramisu, No Shortcuts

    Real Tiramisu, No Shortcuts

    Tiramisu means pick me up, and the real thing, espresso-soaked ladyfingers under clouds of mascarpone cream, cocoa drifting over the top, does exactly that. No baking, no gelatin, no whipped topping impostors: just assembly, technique in two small places, and an overnight rest that does the actual work. Here is the classic, as Italy makes it.

    The cream: mascarpone, treated gently

    Separate 4 eggs. Whisk the yolks with 100g sugar over a pan of barely simmering water for about 5 minutes until pale, thick and warm (this softens the raw-egg question and builds stability). Off the heat, fold in 500g of room-temperature mascarpone until smooth: overbeating splits mascarpone, so fold, do not thrash. Whip the whites to soft peaks and fold them in for lightness. Some versions use whipped cream instead of whites: both are legitimate; the whites version is airier.

    The dip: two seconds, no more

    Brew 300ml of strong espresso, sweeten with a spoonful of sugar, add a splash of marsala or dark rum if you like, and cool it. Now the crucial act: dip each savoiardi ladyfinger for barely two seconds per side, in and out. The biscuit should be coated, not saturated: it finishes absorbing in the fridge, and the two-second rule is the entire difference between tiramisu and coffee soup.

    Build and rest

    1. A thin smear of cream on the dish bottom, then a snug layer of dipped ladyfingers.
    2. Half the mascarpone cream, spread level.
    3. Second layer of dipped biscuits, remaining cream, smoothed with a little ceremony.
    4. Refrigerate at least 6 hours: overnight is the true recipe.
    5. Dust generously with cocoa only just before serving, so it stays velvet-dark.

    The rest is not optional: the layers marry overnight into the sliceable, spoon-yielding texture that defines the dessert.

    Serving and keeping

    Serve cold, in generous squares, with nothing else on the plate, tiramisu shares billing with no one. It keeps three days covered in the fridge, improving through day two. It also happens to be the ideal dinner-party dessert: made entirely the day before, zero last-minute work, and a guaranteed moment of silence at first bite.

    The rules of authenticity

    Real mascarpone, real espresso, real savoiardi: no cream cheese, no instant coffee, no sponge cake. Berries and matcha versions exist and have their fans, but master the classic first: some recipes survive unchanged for a reason, and this is one of Italy’s best arguments.

    Save this Italian classic, and layer up more dessert recipes on Plumeo. Daily indulgence at @Plumeoblog.

  • Eggs Benedict Without the Fear

    Eggs Benedict Without the Fear

    Eggs Benedict is brunch’s final boss: two techniques with fearsome reputations, poached eggs and hollandaise, stacked on a muffin and served to people you like. Both techniques are actually gentle once you know their two or three rules, and conquering them at home turns any Sunday into an occasion with cutlery.

    Poached eggs: the calm method

    1. Use the freshest eggs you have: fresh whites hold together: and crack each into a small cup first.
    2. Bring a deep pan of water to a bare simmer, just trembling, with a splash of vinegar (insurance, not flavor).
    3. Stir a lazy whirlpool, slide the egg into the center, and leave it alone for 3 minutes.
    4. Lift with a slotted spoon: the white set, the yolk visibly soft.

    Poach ahead if hosting: hold finished eggs in cold water, then dip 45 seconds in hot water to serve. Restaurants do exactly this; nobody has ever noticed.

    Hollandaise that will not break

    Blender hollandaise is the home cook’s honest shortcut: blitz 3 egg yolks with a tablespoon of lemon juice and a pinch of salt, then stream in 170g of hot melted butter with the motor running until thick and pale. Season with a whisper of cayenne. The hot butter cooks the yolks as it emulsifies: no double boiler, no whisk cramp, no tears. Too thick? A teaspoon of warm water loosens it. It holds 30 minutes near the warm stove: never over direct heat.

    The stack, in order

    Split and toast English muffins properly, butter them (yes, in addition to everything), then a slice of good ham or crisped back bacon, warm from a quick pan sear. Poached egg on top, hollandaise spooned generously so it drapes down the sides, and a pinch of chives or paprika for the finish. Serve immediately, the yolk-and-hollandaise merge is a timed event.

    The variations bench

    • Florentine: wilted spinach instead of ham.
    • Royale: smoked salmon, plus a squeeze of extra lemon in the sauce.
    • Avocado Benedict: the modern classic, with chili flakes.

    Run the timing like a kitchen

    Order of operations: hollandaise first (it waits patiently), eggs poached and held, ham seared, muffins toasted last. Assembly takes ninety seconds and should be the only thing happening in that moment. Coffee refilled, plates warm, and brunch’s crown jewel lands at home for a fraction of the restaurant markup, with the smugness included free.

    Save this brunch classic, and stack up more breakfast recipes on Plumeo. Daily deliciousness at @Plumeoblog.

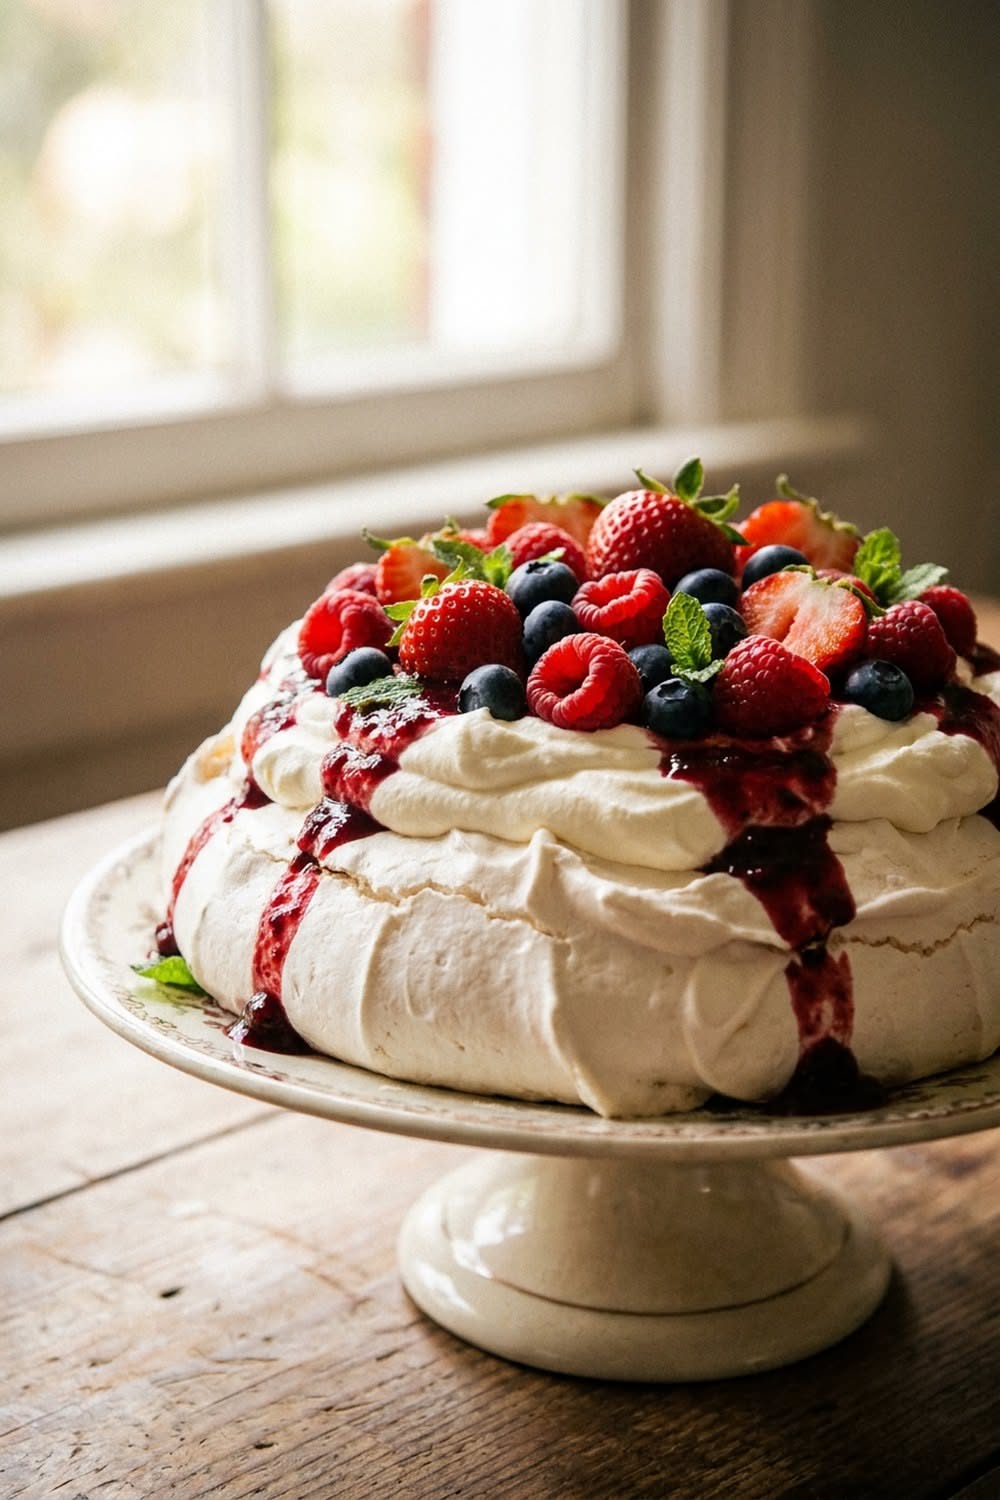
  • Berry Pavlova: The Cloud You Can Eat

    Berry Pavlova: The Cloud You Can Eat

    The pavlova is dessert as special effect: a meringue that shatters at the crust and turns to marshmallow inside, buried under cream and a jewel heap of berries. Australia and New Zealand still argue over who invented it: everyone agrees on how it should taste. Four ingredients in the base, a patient oven, and one cooling trick stand between you and the cloud.

    Meringue rules, non-negotiable

    Room-temperature egg whites, a scrupulously clean, grease-free bowl (one smear of fat kills the foam), and not a fleck of yolk. Whisk 4 whites to soft peaks, then add 220g of caster sugar a spoonful at a time, whisking until the meringue is stiff, glossy and no longer grainy when rubbed between two fingers, the rub test is the checkpoint most recipes skip. Finally fold in a teaspoon of cornflour and a teaspoon of white vinegar: this pair engineers the marshmallow middle.

    Shape and bake low

    1. Mound the meringue into a 20 cm circle on baking parchment, building the sides slightly higher than the center: you are making a nest, not a dome.
    2. Bake at 120°C for about 75 to 90 minutes until the shell is dry and lifts off the paper.
    3. Then the trick: turn the oven off and leave the pavlova inside, door closed, until completely cool: hours, or overnight.

    Sudden temperature change is what cracks and collapses pavlovas: the slow in-oven cool-down is the entire insurance policy. Hairline cracks that happen anyway are character, and cream hides everything.

    The crown: cream and berries

    Whip 300ml of cream with a spoonful of sugar and a splash of vanilla to soft peaks and pile it into the nest. Then the berries: strawberries, raspberries, blueberries, whatever is ripest, tossed with a spoonful of sugar ten minutes beforehand so they turn glossy. A scatter of passionfruit pulp over the top is the antipodean signature and cuts the sweetness perfectly. Mint leaves if you are feeling editorial.

    Assembly timing

    The naked meringue keeps two days in an airtight container, but once dressed, pavlova is on the clock: assemble within an hour of serving, because the cream slowly softens the shell. Bring the whole thing to the table intact for the reveal, then serve in generous shards, part crisp, part marshmallow, entirely gone by the second lap.

    Seasonal variations

    Summer is berries; autumn suits poached pears and toasted almonds; winter takes citrus segments and pomegranate; and a swirl of lemon curd through the cream improves every version ever made. The meringue is a stage: book it accordingly, and expect encore requests.

    Save this showstopper to your dessert board, and float through more baking recipes on Plumeo. Daily sweetness at @Plumeoblog.

  • New York Cheesecake: Dense, Creamy, Uncracked

    New York Cheesecake: Dense, Creamy, Uncracked

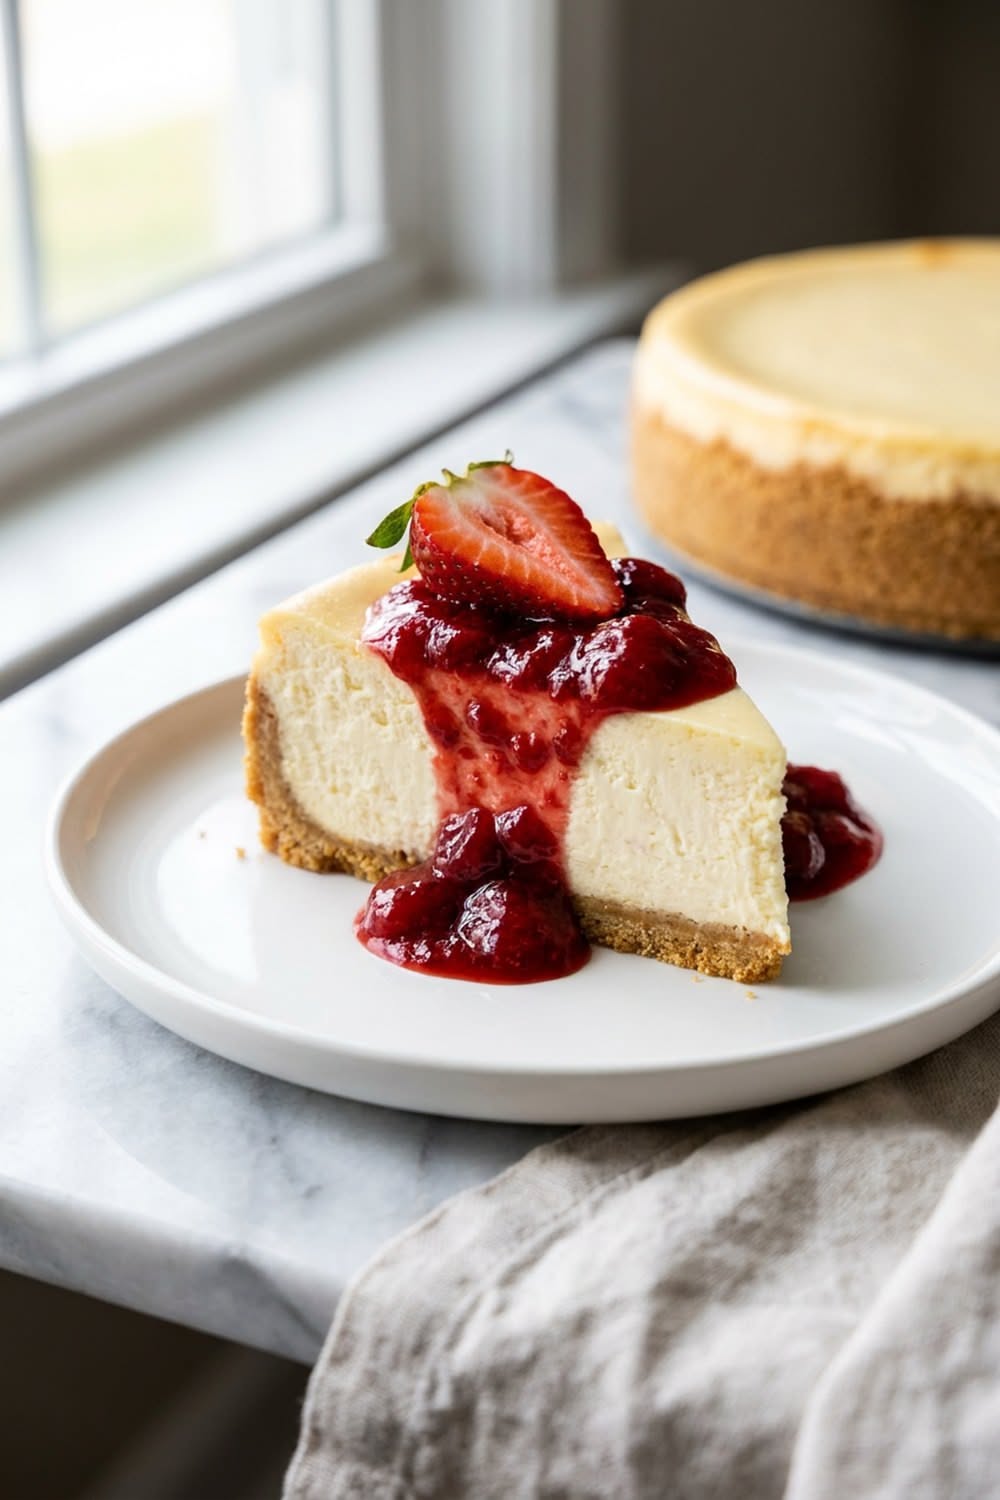
    New York cheesecake does not apologize: dense, tall, unapologetically rich, vanilla-scented and utterly smooth, on a buttery graham base. There is no ricotta lightness here, no soufflé ambitions, just cream cheese operating at full authority. The technique is a handful of rules about temperature, speed and patience, and every crack you have ever seen came from breaking one of them.

    The crust: five minutes, no drama

    Crush 200g of graham crackers (or digestive biscuits) to sand, mix with 85g melted butter and 2 tablespoons of sugar, and press firmly into the base of a 23 cm springform: a flat-bottomed glass makes it even. Bake 10 minutes at 175°C and cool. Wrap the pan’s outside in a double layer of foil now: the water bath is coming.

    The filling rules

    • Everything room temperature: 900g cream cheese, 4 eggs, 240ml sour cream: cold ingredients equal lumps, and lumps are forever.
    • Low speed only: beat the cream cheese with 250g sugar until just smooth: whipping in air is what makes cheesecakes rise, fall and crack.
    • Eggs last, one at a time, with a tablespoon of vanilla and the sour cream, mixing minimally after each.
    • A tablespoon of flour stabilizes if you want extra insurance.

    The water bath and the slow cool

    Set the foil-wrapped pan in a roasting tray, pour in hot water halfway up the sides, and bake at 160°C for 60 to 75 minutes, until the edges are set and the center still wobbles like set custard. Then the discipline: oven off, door cracked open, cheesecake left inside for a full hour. Then room temperature, then overnight in the fridge. Every stage of this descent is crack prevention: cheesecake hates surprise, and the overnight chill is where the texture becomes legendary.

    Serving like a deli

    Run a thin knife around the edge before releasing the springform. Slice with a hot, dry knife, wiped clean between cuts, for those glossy deli-counter wedges. Serve plain, the New York way, or with macerated strawberries, cherry topping or a whisper of lemon curd. It keeps five days refrigerated and, sliced, freezes shockingly well, not that survival to day five has ever been documented.

    If it cracks anyway

    Sour cream topping: 240ml sour cream, 2 tablespoons sugar, spread over the cooled cake. Cracks vanish, flavor improves, and history is rewritten. Every deli knows this trick: now you do too.

    Save this classic, and slice into more dessert recipes on Plumeo. Daily indulgence at @Plumeoblog.